The Best Pin Vise, Drill Bits and Magnets
One cheap hand drill unlocks three upgrades: weapons that swap, metal arms that stop falling off, and bases that stick to a steel tray.
The short answer
Buy the Tamiya Fine Pin Vise D if you want one tool that covers everything from a 0.3 mm pin hole to a 3 mm magnet recess, or the Excel double-ended pin vise to spend a third as much on the pinning range alone. Buy a 20-bit 0.3-1.6 mm set at the same time: the bit decides the hole, not the handle.
The quick version
| # | Product | Best for | Score | Price |
|---|---|---|---|---|
| 1 |  Tamiya Fine Pin Vise D (74050), 0.1-3.2 mmThe one most hobbyists end up owning. A knurled metal body with a free-spinning cap, and a collet range wide enough that one tool covers a 0.5 mm pin hole and a 3 mm magnet recess. | Best pin vise overall | 9.1 | Check price on Amazon |
| 2 | Excel Blades Double-Ended Pin Vise (70023)A four-inch steel pin vise with a chuck at each end, so two bits stay loaded and you flip the tool instead of swapping collets. Takes #80 up to #50 bits, which is the pinning range. | Best budget pin vise | 8.3 | Check price on Amazon |
| 3 |  Micro Twist Drill Set, 0.3-1.6 mm (20 bits)Twenty high-speed steel bits in a dispenser, stepping from 0.3 mm up to 1.6 mm. Buy this before you buy a better pin vise — the bit decides the hole, not the handle. | Buy with your first pin vise | 8.8 | Check price on Amazon |
| 4 |  Neodymium Disc Magnets, 3 x 1 mmThe classic hobby size. A 3 mm disc drops into a 3 mm hole in a shoulder or a wrist and holds a plastic arm without being seen. Pull is modest, which is the point. | Best magnet for arms and weapons | 8.5 | Check price on Amazon |
| 5 | Neodymium Disc Magnets, 3 x 2 mm and 5 x 2 mmThe base sizes. Green Stuff World's own guidance is 3 x 2 mm under a plastic base and 5 x 2 mm under a metal or resin one, because the model's weight is what you are fighting. | Best magnet for bases | 8.6 | Check price on Amazon |
| 6 | Brass Rod for Pinning, 1/32 in (about 0.8 mm)Five twelve-inch lengths of quarter-hard 260 brass. Drill both halves of a joint, glue a short length in, and a metal arm that used to fall off is mechanically fixed instead. | Best pinning stock | 8.9 | Check price on Amazon |
| 7 | 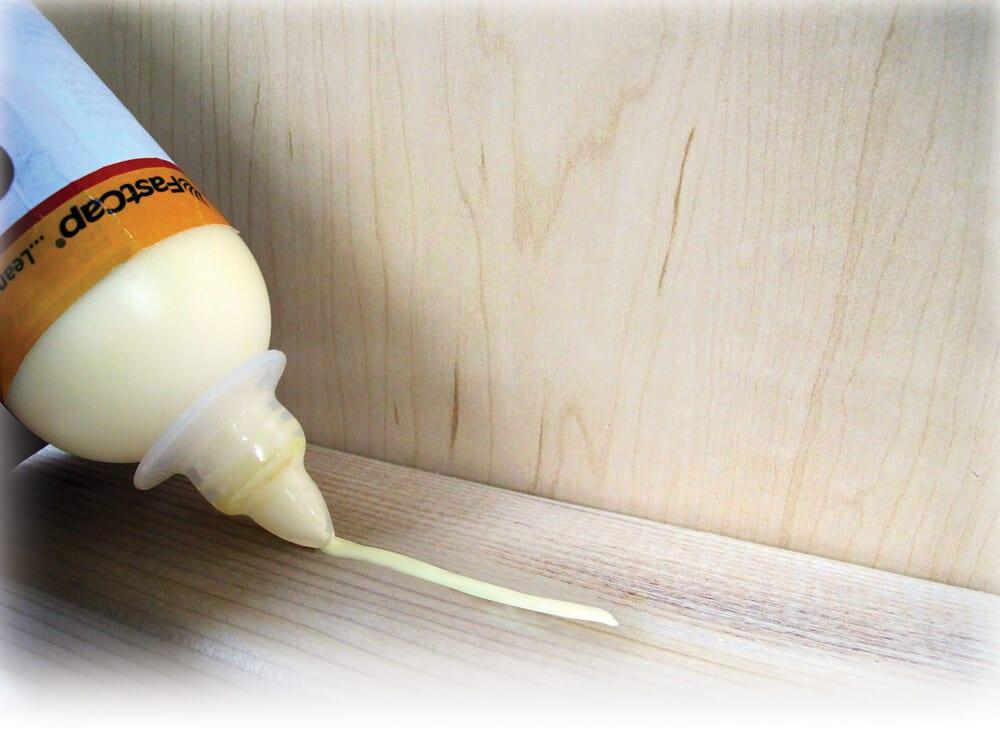 Cyanoacrylate gel (super glue, gel formula)The glue for everything solvent cement cannot touch. The gel formula is the one to buy: it stays where you put it instead of running into detail. | The glue that holds a magnet | 8.7 | Check price on Amazon |
Scores are our own editorial read against the criteria stated below — not a lab measurement and not a user rating. Tap a row for the full write-up.
What we judged these on
This page covers one tool and three consumables, so there is no single ranking that makes sense across all of them. Each group is scored on the criteria that matter for its own job:
- Pin vises on bit range, grip and control, collet quality and value. The range is the one that catches people out: a pin vise sized for pinning will not open a 3 mm hole for a magnet.
- Drill bits on size coverage, durability, storage and value. The cheapest part of this purchase and the part that decides whether it works.
- Magnets on holding power, how well they hide in the part, size consistency and value. Bulk packs vary more than their listings admit.
- Brass rod on joint strength, ease of use, size range and value.
Scores are our editorial read against those criteria, not lab results. Dimensions, alloy, bit ranges and magnet pull figures come from manufacturer and retailer listings, cited at the foot of the page.
The three jobs a hand drill does
A pin vise is a handle with a collet. It looks like the least interesting tool in the hobby, and then it turns out to be the gate on three upgrades that nothing else delivers.
Pinning
Metal and resin models have a real problem: super glue on a flat, small contact area is a weak, brittle joint, and a heavy metal arm will eventually shear off. Pinning fixes it mechanically. Drill a hole in each half of the joint, glue a short length of brass rod into one side, and the joint now has a steel-like spine through it instead of a film of glue.
This is the original reason pin vises exist in the hobby and it is still the strongest argument for buying one. Any 3D printed resin model with thin wrists needs it, and so does every older metal miniature.
Magnetizing
Two separate uses, and they need different magnets. Weapon swaps: drill a 3 mm hole in a shoulder and in the arm, glue a 3 × 1 mm disc in each, and one model can field three loadouts instead of one. Base magnets: drill the underside of each base, set a 3 × 2 mm or 5 × 2 mm disc in it, and your army now stands up inside a steel-tray case with nothing touching a banner or an antenna.
The transport case question is where most people hit this: magnetic trays are genuinely the best protection available, and the transport case roundup is blunt that every base has to be magnetized before the case is any use. This is the page that tells you what to buy to do that.
Hollowing gun barrels
A 0.8 mm or 1 mm hole drilled into the end of a molded gun barrel is possibly the highest return-per-second job in the hobby. It takes ten seconds per model, it costs nothing, and it is immediately visible in a way that most detail work is not. If you only ever use a pin vise for this, it was worth the money.
Which pin vise, and why the range matters
Pin vises differ in exactly one thing that matters: the range of bit shanks the collets will hold. Everything else — knurling, cap, length — is comfort.
The Tamiya Fine Pin Vise D covers 0.1 mm to 3.2 mm, using a second collet at the top of the range. That span is the whole hobby in one tool: the 0.5 mm hole for a brass pin, the 1 mm gun barrel, the 3 mm magnet recess. It is the reason this one is the default recommendation despite costing several times a generic.
The Excel double-ended vise takes #80 to #50 bits — roughly 0.35 mm to 1.8 mm. That covers pinning and barrels completely and cannot open a 3 mm magnet hole at all. If you know you are pinning and not magnetizing, it is the better buy and it holds two bits at once, which in practice saves more time than a wider range does.
The cheap pin vises with a swivel head and four interchangeable chucks, sold in every marketplace, genuinely work. Their collets are softer and lose grip on the finest bits sooner, and the chuck that holds the biggest bits is usually the one that slips. For a first purchase they are fine; the tool is not where the frustration comes from.
What not to buy: a rotary tool. A Dremel at 10,000 rpm against a 32 mm plastic base will melt the plastic, grab, and throw the base across the room. Hand drilling is not a budget compromise here — it is the correct method, because you can feel the bit cutting.
Drill bits: the sizes you actually need
A 20-bit set spanning 0.3 mm to 1.6 mm is the standard hobby buy, and four of those bits do almost all the work:
| Size | What it is for |
|---|---|
| 0.5 mm | Pin holes for fine wire; the smallest practical pinning size |
| 0.8 mm | Brass rod pinning (1/32 in rod); small gun barrels |
| 1.0 mm | Gun barrels on 28-32 mm models; pinning heavier metal parts |
| 1.5-1.6 mm | Wire for banners, cables and armatures |
Magnet holes are bigger than any of those: a 3 mm magnet needs a 3 mm bit, which is beyond a 0.3-1.6 mm set and beyond most pin vises. Either buy the Tamiya D and a single 3 mm bit, or use a hand-held reamer, or drill a smaller hole and open it out with a knife tip. All three are normal.
Two practical notes. First, the smallest bits are consumables — 0.3 mm high-speed steel snaps if you flex it even slightly, and buying a set rather than individual bits is what makes that acceptable. Second, cheap sets skip sizes and run loose on tolerance; one well-documented 20-bit set has no 1.1 mm bit at all. Neither is a reason to avoid them at this price.
Magnet sizes, and the mistake everyone makes once
Magnet choice is a weight problem. The disc has to hold the part against gravity and against a knock, and nothing else about it matters.
- 3 × 1 mm — arms, heads, weapons, backpacks on plastic models. Sits flush in a 1 mm recess so nothing shows. A 3 × 1 mm N42 disc is rated around 0.19 kg of pull by First4Magnets, which is plenty for a plastic arm and not enough for a metal one.
- 3 × 2 mm — Green Stuff World’s own recommendation for magnetizing a plastic base.
- 5 × 2 mm — their recommendation for metal and resin bases, where the model is heavier and the margin matters.
The mistake, and nearly everybody makes it exactly once: polarity. Glue a magnet into a shoulder one way and into the arm the other way, and the arm now pushes itself off. The fix is a routine, not a skill. Stick all the magnets you are about to use onto a steel ruler in one stack, mark the exposed face of the stack with a marker, and always glue the marked face inward. Do it the same way every time and you will never think about it again.
Second mistake: drilling a 2 mm recess into a thin plastic base and coming out the other side. Check the base thickness first. On a slotted base, glue a thin plasticard disc over the slot before you drill.
One honest limit on magnetized bases: a hard knock shears a model off its magnet where foam would have caught it. Magnetic trays are better protection against rub and snagging, not against being dropped.
Drilling plastic, resin and metal are three different jobs
The bit is the same. Everything about how you use it changes with the material, and this is where most broken bits and ruined parts come from.
Hobby polystyrene is the easy case. It cuts with almost no pressure, and pressure is the enemy — push a 0.5 mm bit and it wanders off the mark or snaps. Turn the vise, let the flutes clear, and back the bit out every few turns to drop the swarf. Start the hole with the tip of a knife so the bit has a dimple to sit in; a bit started on a smooth curved surface will skate.
Resin cuts even faster and produces a fine dust you should not be breathing. Cured resin dust is a respiratory irritant, so drill over a damp cloth or with a bead of water on the surface, which keeps the dust down and gives a cleaner hole at the same time. Resin is also brittle: a wrist or an ankle will shear off under sideways pressure that plastic would absorb. Support the part in your fingers directly behind where the bit is cutting. Our picks for protective gear are in the respirator roundup — a P100 filter covers sanding and drilling dust as well as airbrush overspray.
White metal and pewter are the slow case, and the one where a cheap pin vise shows its limits. Metal grabs the bit and twists it, so a collet that is not holding tight will spin on the shank and polish it smooth. File or sand the contact face flat first, mark the center with a scribe so the bit cannot wander, and expect to clear the flutes constantly — metal swarf packs into a 0.8 mm hole and binds. Pewter also drills best with a few turns, a withdraw, and a repeat; forcing it is how bits snap off inside the part, which is a far worse problem than a snapped bit.
One habit that applies to all three: drill before you glue and before you paint. Hollowing a barrel on a finished model means dust and swarf on paint you cannot clean, and drilling a joint after assembly means no access and no alignment.
How to pin a joint, in five steps
Worth stating plainly, because the technique is the whole product here and nothing about it is obvious.
- Dry-fit the two halves and mark the center of the contact face on each with a pen or the tip of a knife. Alignment is the entire difficulty.
- Start both holes with the knife tip so the bit does not wander, then drill 2-3 mm deep with a 0.8 mm bit, turning the pin vise rather than pushing it.
- Cut a length of brass rod slightly shorter than the two depths combined. Use old side cutters, never your good nippers — brass chips a blade meant for styrene.
- Glue the rod into one half with gel super glue, let it set, then dry-fit again. If it sits proud, shorten it rather than forcing it.
- Glue the joint. The pin carries the load; the glue just holds the faces together. Fill any remaining gap afterward — see the gap filler picks.
Magnetizing is the same process with a shallower, wider hole and no rod: drill, test the fit, glue the magnet in with the marked face consistent, fill over the top if it sits below the surface.
What decides price
On pin vises, collet quality and brand. A Tamiya costs several times a marketplace generic and drills the same hole; what you get is collets that keep gripping a 0.3 mm shank after a year and a body that is comfortable at an awkward angle. That is a real difference and it is a small one.
On bits, almost nothing — they are all plain high-speed steel at this size and they are all consumable. On magnets, grade (N35 through N52) and honesty about dimensions; a seller claiming N52 at half the going rate is usually neither. On brass rod, nothing at all; a pack is years of pins.
The whole kit on this page — a decent pin vise, a bit set, a pack of magnets and a pack of rod — costs less than one mid-size model kit and permanently changes what you can do with every model you own. That is an unusually good trade in a hobby where most upgrades cost more and change less.
The verdict
If you buy one thing: the Tamiya Fine Pin Vise D plus a 0.3-1.6 mm bit set. One tool, every hole, no second purchase when you decide to magnetize.
If you are pinning only: the Excel double-ended vise. Two loaded bits, a third of the price, and it covers the whole pinning range.
If you are magnetizing an army: buy 3 × 1 mm discs for arms and weapons and 3 × 2 mm or 5 × 2 mm for bases, in one order, in bulk. Running out halfway through an army is how half-magnetized armies happen.
If your models keep breaking: brass rod, and learn to pin. It is the only fix that actually works on metal and resin, and it costs almost nothing.
From here: the rest of the kit-building tool set is in the beginner tool picks, holding the part while you drill it is a painting handle’s job, and if you cannot see the hole you are drilling, a magnifier fixes more than a steadier hand will.
The picks in full
Tamiya Fine Pin Vise D (74050), 0.1-3.2 mm
The one most hobbyists end up owning. A knurled metal body with a free-spinning cap, and a collet range wide enough that one tool covers a 0.5 mm pin hole and a 3 mm magnet recess.
What it gets right
- One tool from a 0.3 mm pin hole to a 3 mm magnet recess, which is the whole hobby range
- The spinning cap lets you drive with one hand and hold the part with the other
- Short and thick enough to control at an awkward angle, where a long pin vise wants to wander
Who it is wrong for
- Collets are the weak point — over-tighten on a 0.3 mm bit and the bit snaps, not the collet
- Costs several times a generic pin vise that drills the same hole
- Stock comes and goes at US retailers; it is frequently a back-order
Scored against this page’s criteria
Specs from the manufacturer: Tamiya product page
We do not publish prices. Amazon shows the current one, which is the only one that is ever right. #ad · how this is funded
Excel Blades Double-Ended Pin Vise (70023)
A four-inch steel pin vise with a chuck at each end, so two bits stay loaded and you flip the tool instead of swapping collets. Takes #80 up to #50 bits, which is the pinning range.
What it gets right
- Two loaded bits means a pin hole and a clearance hole without stopping to change collets
- Steel self-centering chucks hold a 0.5 mm bit straighter than most cheap pin vises
- Cheap enough to own two, and a second one saves more time than any upgrade
Who it is wrong for
- Tops out around 1.8 mm, so it cannot open a 3 mm magnet recess at all
- Bit sizes are quoted in wire gauge, not millimeters, which is a conversion chore against metric hobby plans
- No palm cap — you roll it between your fingers, which is slower on a deep hole
Scored against this page’s criteria
Specs from the manufacturer: Excel Blades product page
We do not publish prices. Amazon shows the current one, which is the only one that is ever right. #ad · how this is funded
Micro Twist Drill Set, 0.3-1.6 mm (20 bits)
Twenty high-speed steel bits in a dispenser, stepping from 0.3 mm up to 1.6 mm. Buy this before you buy a better pin vise — the bit decides the hole, not the handle.
What it gets right
- Covers every hole this hobby asks for: 0.5 mm for brass pins, 0.8-1 mm for gun barrels, 1.5 mm for wire
- Having the exact size means a pin that fits snugly instead of swimming in glue
- Cheap enough that snapping a 0.3 mm bit is an annoyance rather than an event
Who it is wrong for
- The smallest bits snap if you flex them at all — treat 0.3 mm as a consumable
- Budget sets skip sizes (some have no 1.1 mm) and tolerances on the finest bits are loose
- Plain high-speed steel dulls on resin and filled plastics faster than carbide would
Scored against this page’s criteria
Specs from the manufacturer: Zona product page
We do not publish prices. Amazon shows the current one, which is the only one that is ever right. #ad · how this is funded
Neodymium Disc Magnets, 3 x 1 mm
The classic hobby size. A 3 mm disc drops into a 3 mm hole in a shoulder or a wrist and holds a plastic arm without being seen. Pull is modest, which is the point.
What it gets right
- Thin enough to sit flush in a 1 mm recess, so nothing shows once filler goes over it
- Strong enough for a plastic arm and weak enough that a knock separates it rather than snapping the part
- Sold in packs of 50 to 100, so one order magnetizes an army's worth of weapon options
Who it is wrong for
- Too weak for a heavy resin or metal weapon — those want 3 x 2 mm or larger
- Cheap bulk packs run under the stated thickness; one buyer measured a 3x1 mm batch averaging about 0.8 mm
- Polarity discipline is on you: glue one in backwards and the arm repels instead of holding
Scored against this page’s criteria
Specs from the manufacturer: Green Stuff World product page
We do not publish prices. Amazon shows the current one, which is the only one that is ever right. #ad · how this is funded
Neodymium Disc Magnets, 3 x 2 mm and 5 x 2 mm
The base sizes. Green Stuff World's own guidance is 3 x 2 mm under a plastic base and 5 x 2 mm under a metal or resin one, because the model's weight is what you are fighting.
What it gets right
- Turns a foam case into a magnetic one — models stand upright and nothing touches a banner or an antenna
- A 2 mm thickness still hides inside a standard 32 mm plastic base once the recess is filled over
- One pack covers a whole army, and magnetized bases survive a car journey far better than foam
Who it is wrong for
- Magnetizing every base is an evening of work before the case is any use at all
- A hard knock can shear a model off its magnet where foam would have caught it
- A 2 mm recess in a thin plastic base can break through — check the base depth before you drill
Scored against this page’s criteria
Specs from the manufacturer: Green Stuff World product page
We do not publish prices. Amazon shows the current one, which is the only one that is ever right. #ad · how this is funded
Brass Rod for Pinning, 1/32 in (about 0.8 mm)
Five twelve-inch lengths of quarter-hard 260 brass. Drill both halves of a joint, glue a short length in, and a metal arm that used to fall off is mechanically fixed instead.
What it gets right
- Turns a butt joint into a pinned joint, which is the only real fix for heavy metal and resin parts
- Stiff enough to carry weight and soft enough to cut and bend with hobby tools
- A single pack is years of pins; cost per joint is effectively nothing
Who it is wrong for
- Pinning means drilling both halves in alignment, and a hole half a millimeter off shows
- Rods frequently arrive with a slight bend and need straightening before use
- Never cut it with your good nippers — brass chips a blade meant for styrene
Scored against this page’s criteria
Specs from the manufacturer: K&S Precision Metals product page
We do not publish prices. Amazon shows the current one, which is the only one that is ever right. #ad · how this is funded
Cyanoacrylate gel (super glue, gel formula)
The glue for everything solvent cement cannot touch. The gel formula is the one to buy: it stays where you put it instead of running into detail.
What it gets right
- Bonds resin and metal, which is most of what a solvent cement will refuse
- Gel does not wick into recesses and ruin the detail around the joint
- Doubles as a gap filler, especially with a dusting of baking soda
Who it is wrong for
- A brittle bond — it shears under stress where a solvent weld would flex
- Fogs clear parts and leaves a white bloom on dark surfaces
- Glues fingers to models with total reliability
Scored against this page’s criteria
We do not publish prices. Amazon shows the current one, which is the only one that is ever right. #ad · how this is funded
FAQ
Questions people actually ask
What is a pin vise used for in miniature painting?
What size drill bit do I need for miniatures?
What size magnets do I need for miniature bases?
How do I stop magnets from repelling each other?
Can I use a Dremel instead of a pin vise?
What do you use to pin miniatures?
Is magnetizing bases worth it?
More in Model Kit Tools for Gunpla and Scale Models, or start from the beginning with what to buy first.
Sources
- HobbyLink Japan — Tamiya Fine Pin Vise D 74050, 0.1-3.2 mmchecked November 2026
- AMain Hobbies — Excel double-ended steel pin vise 70023, two chuckschecked November 2026
- Factory Direct Hobbies — Zona 37151 high-speed twist drills, metric 0.3-1.6 mmchecked November 2026
- Green Stuff World — neodymium magnets 3x1 mm, with base-size guidancechecked November 2026
- First4Magnets — 3 mm dia x 1 mm thick N42 neodymium magnet, 0.19 kg pullchecked November 2026
- Industrial Metal Supply — K&S 8160 brass rod, 1/32 in, alloy 260 quarter hardchecked November 2026